Friday, October 30, 2009

The ultimate chocolate cake


WHO would have thought that the ultimate chocolate cake would be lurking right under my nose all these years?


It’s been quite a few years now since I, while poking through a newsagent’s to escape a sudden shower, spotted a Women’s Weekly Chocolate Cakes cookbook, half-hidden behind dodgy wedding magazines and a couple of stray birthday cards thoughtfully posted on the wrong shelf by a bored toddler. I bought it, of course – hello, a book devoted entirely to chocolate cakes? Come on – but for some reason, every time I thought to bake something from it, I got distracted, didn’t have the right ingredients … the list went on.


Then, a month or so ago, on a night when I was home alone and feeling peckish, I picked it up, glanced at the recipe for the family chocolate cake and thought, what the hell? It wasn’t the sort of recipe I usually make – no creaming of butter and sugar, my favourite part of the baking process – but I pulled out a saucepan, stirred the melting butter and baking powder mixture assiduously to ensure it didn’t boil over, and held my breath as I slid the quite-liquid batter into the oven.


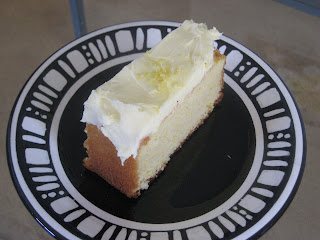
But when I’d iced it, sliced it and taken my first bite – my god. I inhaled the (rather, um, large) slice I’d cut and it was all I could do to stop myself from eating the rest of the slab. It was soft, moist, still warm, thanks very much, with a slightly caramelised crunch on the top that melted into the fudgy icing. It was so good I pulled out the laptop and emailed pictures to my boyfriend at work: “OH MY GOD YOU SHOULD SEE THE CAKE I JUST BAKED”. It was just as good the next day, too: still soft and moist, with a deliciously fudgy interior to make up for the lack of straight-from-the-oven warmth.


It was so good, in fact, that I made it again not a fortnight later. This time with the help of my four-year-old niece, who I hoisted up on to my hip so she could stir the buttery icing mixture before she sat on the bench and sifted the icing sugar over the bench, over us, into her mouth - and even into the bowl.


Family chocolate cake

Adapted from the Women's Weekly Chocolate Cakes cookbook


1 cup water

1 1/2 cups caster sugar

125g butter, chopped

20g cocoa powder

1/2 tsp bicarb soda

1 1/2 cups self-raising flour

2 eggs, lightly beaten


Chocolate fudge icing


90g butter

1/3 cup water

1/2 cup caster sugar (I used slightly less)

1 1/2 cups icing sugar

1/3 cup cocoa powder


Preheat oven to 180C and grease and line a 22cm round cake tin


Place water, butter, sugar, sifted cocoa powder and bicarb soda in a medium-large saucepan and stir over medium heat until sugar dissolves. Bring to a boil, reduce the heat and simmer for 5 minutes. Watch it, it will bubble up.

Transfer to bowl of mixer (or medium bowl) and allow to cool.

Add sifted flour and egg and beat until batter is smooth and a paler colour.

Pour into tin and bake for 50 minutes or until a skewer comes out clean.

Top may brown rapidly - it can be covered with a piece of foil but I really like the crunchy top

Let the cooked cake cool in the tin for 10 minutes before turning out onto a rack to cool completely.


For icing, place water, sugar and butter in a saucepan and stir until sugar dissolves.

Sift icing sugar and cocoa into a small bowl and gradually beat in the butter mixture. It will be very liquid.

Refrigerate, covered, for about 30 minutes or until thickened to your satisfaction.

Beat with wooden spoon until spreadable and pour over cooled cake.


Friday, October 16, 2009

Around the world for a pie


HERE in Sydney, the past few weekends have been a sporting smorgasbord.

Three weeks ago it was the AFL Grand Final. Two weeks ago it was the NRL Grand Final. This weekend just gone was Australia’s biggest car race, the Bathurst 1000.

What else is a girl to do but make meat pies to go with the frolicking on the field?

You’d be hard-pressed to find anything more Australian than a meat pie, but it’s the joy of the internet era that I made Clotilde’s olive oil pastry for the bases of my pies. I had been planning to try out Maggie Beer’s sour cream pastry but a bit of forgetfulness at the shops on Saturday morning ruled that out, and there’s something very 2009 about using a Parisian pastry for an Aussie staple.

It was fabulous, too, may I say, especially for someone who tends to have a heavy touch with pastry – easy to knead and roll out and beautifully short and flaky in the finished product, with the herbs - I used oregano, coriander and a touch of cumin - adding a lovely bit of flavour.

The filling originally called for two tablespoons of Worcestershire sauce and the flavour was a little overpowering, so I’ve knocked it down to one tablespoon in my recipe below.

Served with mashed potatoes, peas and a generous slathering of tomato sauce (which I forgot to take a picture of - what an amateur!) it was waaaaaaaaaaaaaaaaaay better than anything you could get at the footy.

Oh, I almost forgot - I had a bit of filling left over after making the pies, which I have whacked in the freezer with the thought of making a nice easy pasta bake in the next week or so.


Meat pies


Makes 4 individual pies


1 tbs olive oil

1 large brown onion, finely chopped

1 carrot, julienned

1 zucchini, diced

A generous handful of button mushrooms, chopped

500g lean beef mince

1 tbs cornflour

3/4 cup beef stock

3/4 cup tomato sauce

1 tbs Worcestershire sauce

1 tbs barbecue sauce

1 tsp Vegemite

1 quantity Clotilde's olive oil pastry

1 sheets frozen puff pastry, thawed

1 egg, beaten


Heat oil in a saucepan over medium-high heat. Add onion and vegetables and cook until onion is soft.
Add mince and cook, breaking up lumps with a wooden spoon, until browned. Toss in cornflour and cook, stirring for 1 minute.
Add stock, sauces and Vegemite to mixture. Bring to the boil, reduce heat to medium-low and simmer for 8 minutes or until thick. Allow to cool.
Preheat oven to 220°C.
Make the olive oil pastry, divide into quarters and roll out to fit four 10cm pie plates. Allow to rest in the fridge for 20 minutes.
When the pastry is ready, scatter some breadcrumbs on the base (this helps to soak up the juices and keeps your pastry from going soggy) and spoon in the cooled mince mixture.
Cut puff pastry sheet into quarters and use a little water to stick each quarter on a pie, cutting pastry to fit.
Brush with beaten egg, season and use a sharp knife to slit the lid to allow steam to escape.
Bake for 20-25 minutes or until golden.


Friday, September 11, 2009

A taste of support


ON MY trip to France earlier this year, I headed to Monte Carlo for this year’s Grand Depart of the Tour de France.

The steep, cobblestoned streets were full of excited cycling fans milling about, checking out the sights, ogling the giant superyachts in the harbour, staking out their positions for the start of the time trial that would begin the three-week race.

And each and every one, all 40,000 of them, was wearing a yellow LiveStrong wristband. Every person there knew the story of the cycling star who had won seven Tours de France, the toughest sporting event in the world, and - a harder battle yet - had fought, and beaten, 14 cancerous tumours.

Each and every one knew Lance Armstrong’s story and had come to see his return to the race that has almost become synonymous with his name. When he flew past us on his way up the first hill of the time trial that summer's day in Monte Carlo, the cheer that went up was defeaning.

The thing about Lance Armstrong's story that I think reaches most people, cycling fans or not, is this: I bet every person in Monte Carlo to watch his return to the great race would know someone with cancer. Everyone bought a yellow wristband and wore it proudly to show that they might not be able to come up with the cure for cancer, but they were going to support the fight any way they can.

That, too, is why I'm writing this as part of Barbara from Winos and Foodies' annual LiveStrong With A Taste Of Yellow Day, along with dozens of other bloggers from around the world. We might not be able to cure cancer by cooking, but we can show our support and love with a lemon cake or two. And with support like that, this battle against cancer is a fight we must win.

While I’m on the subject, can I urge every woman out there who hasn’t done so yet to talk to their doctor about having the cervical cancer vaccine. I know there's been a lot of talk about possible side-effects, but I have had the entire course, experienced nothing worse than the usual pain from an injection, and am so happy to be doing one extra thing to help stop cancer's spread. And since experts now think it helps older women, and maybe even men, as well as the younger women at whom the vaccine has previously been targeted, clearly the benefits far outweigh the risks. Please, go get it today; put a note on your phone calendar and go back for the full course of three shots. It's seriously well worth it.


Lemon butter cake

This is one of my favourite cakes because it's bloody easy and bloody versatile. I made it today as a simple lemon butter cake with lemon icing, but it also works really well as a syrup cake and it works with any type of citrus.

125g butter
1 cup caster sugar
2 eggs
1 cup self-raising flour
1/2 cup plain flour
1/2 cup milk
1/2 tsp salt
the rind of a large lemon

Preheat oven to moderate and grease and line a loaf tin.

Cream butter well, add sugar and beat until combined and mixture is almost white.

Add eggs one at a time, beating well after each addition.

Sift flour and salt and add alternately with the milk.

Pour batter into prepared tin and bake for 30-40 minutes or until cake springs back and a skewer comes out clean.

for lemon butter icing

80g butter
1 cup icing sugar
1 tbs lemon juice or to taste

Cream butter well. Sift icing sugar and beat into butter. Add lemon juice and beat until the icing has reached your preferred taste.

for lemon syrup

Juice of that large lemon you zested earlier
1/4 cup caster sugar

Mix juice and sugar together and stir until sugar dissolves. When cake is cooked and still warm from the oven, pour lemon juice mix over the top. Leave to cool in tin.


Saturday, August 29, 2009

New tricks


WHEN it comes to non-fattening crafts, I've always been a cross-stitcher.


It's a wonderful craft, intricate enough to demand your whole concentration but simple enough to be relaxing. The only trouble with it is that it's not really very practical - all of my nieces and nephews have cross-stitched birth notices, and my mum has a vast array of pieces, of varying quality, but there are only so many pieces of cross-stich you can fob off on friends and family.


So I had to find a new hobby and, since I suck at knitting, I thought I'd try my hand at crochet. I bought a kit and optimistically signed myself up for a one-day Learn To Crochet class at a local needlework store so I would have some idea of how to follow the "easy-to-follow" instructions in my flash new kit.


After about an hour in the class, though, I was just about ready to fall back on my cross-stitched cushion and sob like a little girl. The room in which the class was being held was freezing, my hands were numb and while all the other women around the table were halfway through their first granny square, I was staring at a line of knotted yarn that looked like it'd fallen off HMS Endeavour.


What the hell was I doing wrong? Buggered if I knew. Buggered if the teacher knew either - she would unravel the chain of knots I'd spent the past half-hour working on, make a few complicated passes with her hands and return my yarn, magically transformed into proper crochet, then pat me soothingly on the shoulder and head off to the next bewildered student.


I honestly thought about just putting my mass of knots on the table and walking out, but then, almost like the magic rubbed off on me, something clicked. It clicked with five minutes until the end of the class, but there it was - I knew how to create a double crochet stitch.


And that's what is in the picture at the start of the post - a scarf, made entirely out of double crochet stitches. It's a bit wobbly at the ends, and the Wayside Chapel's winter appeal will probably benefit from the next few things I try to make, but I was so proud of my first attempt at crochet I had to mention it.

You have to cook this recipe


I HAD to drop everything and flick straight to Outlook when I got an email from my friend Edie with that subject line. You have to cook this recipe that I saw in a CWA cookbook - how could I resist?

Edie lives in Tasmania, two hours' flight from me in Sydney, but she knows me well, and sure enough my eyes lit up as I read this recipe for Malteser cake.

The original recipe called for vanilla Fruche, but I couldn't find it at the shop so I settled for a mixture of normal vanilla yoghurt and sour cream, which I had in the fridge and which had the added benefit of giving the cake a soft, light crumb. The Maltesers melt through for fantastic little pockets of moist, gooey goodness and the white chocolate on top just finishes it off nicely. It was very hard to stop at one piece!

The only problem is that Edie can't come over for a piece - emails and virtual cake and coffee just isn't the same.


Malteser Cake

Adapted from the CWA Cookbook
1 cup self-raising flour
3/4 cup caster sugar
4 tbs cocoa
150g sour cream
150g vanilla yoghurt
2 eggs
2 tbs vegetable oil
165g Maltesers

Preheat oven to 175C and grease an 18cm square tin.
Sift flour and cocoa into a bowl and add sugar.
In a separate bowl, mix together sour cream, yoghurt, eggs and oil.
Add wet ingredients to dry and stir to combine. Fold through Maltesers.
Pour mix into prepared pan and bake for 25-30 minutes.
To decorate, melt white chocolate by microwaving it for a minute on 50% power. Stir and repeat until fully melted.
Pour into a plastic sandwich bag, snip the corner off and drizzle melted chocolate over cake before cutting into pieces.

Saturday, August 22, 2009

A time of change, and cake


IT FEELS like I haven't had time to scratch myself the past couple of weeks.

You know how you go through times where it seems every second of every day has a task allocated to it, with at least three others piled up behind waiting for your attention? Yeah, it's been a bit like that for the past month or so. And it seems to have been the same for everyone I know - are the planets all lining up or something? Everyone seems to be going through massive change.

It's even gotten to the point where, when I do manage to get into the kitchen, I'm too harried or too tired to experiment with new and fun baking experiments, falling back instead on old favourites or stuff that I know I can make quickly.
Luckily, though, my mate Alice forwarded me a recipe that's been doing the rounds of the email lately - the five-minute chocolate mug cake, which is seriously perfect for sudden, late-night cake cravings. If someone were to be prey to sudden cake cravings, that is. I wouldn't know about that sort of thing.

Ahem. Anyway, I tried the five-minute cake on the spur of the moment, just before I had to start getting ready for work, so I can confirm it lives up to its name. It's not the best chocolate cake I've ever eaten - it's a bit like a big muffin, really - but hey, what do you want for five minutes' work? And don't discount the fun of watching it go around in the microwave (below).


Five-minute chocolate mug cake


Serves one happy woman, or two people if she is feeling generous

4 tbs flour
4 tbs sugar
2 tbs cocoa
1 egg
3 tbs milk
3 tbs oil
3 tbs chocolate chips (optional, although I thought they made this cake)
a bit of vanilla
a large mug (and I mean large - see how much it rose!)
Add dry ingredients to mug and mix well.
Pour in milk and oil and mix until combined.
Add chocolate chips and vanilla, stir to combine, and microwave for 3 mins on high (at 1000 watts; cook for longer if the microwave is less powerful).
Eat as soon as it won't burn your mouth.


Sunday, August 16, 2009

Top score!


I GOT into work the other day to find a cupcake sitting on my desk.

Obviously this was pretty damn exciting all by itself – it was chocolate, no less – but when I went over to thank the bringer of the cupcake, my lovely boyfriend, there was even better news in store.

The cupcakes, it came out, had been delivered in a massive cupcake courier that was now sitting, lost and lonely (and completely empty – it’s like a flock of vultures fighting over a carcass when food enters my office), on the mail desk.


Well! Forget the cupcake, this was far more important. A few polite inquiries about the possible future of the cupcake courier later (the office assistant was going to throw it in the bin! The very idea), I was lugging it back to my desk happy as a clam.


Later that night, when I pulled it out from under the desk to head home, my seatmates’ eyes nearly fell out of their heads.


As regular beneficiaries of my baking adventures, they were pretty excited about the courier in itself – but as blokes, it took them all of about five seconds to come up with a different use for it.


“You could fit 12 beers in there!” Danny said. “The ice goes in the cupcake hole and then the beer goes on top!”


For the moment, though, I think I’ll stick to cupcakes, and these carrot ones are one of my favourite cake recipes.


The carrot is a pain in the rear end to grate, I have to admit, but the end result is so moist and flavourful I always forget about my scratched knuckles as soon as the cake is iced.

Carrot and walnut cake

Makes 12 cupcakes

2 cups plain flour

2 cups caster sugar

2 tbs cinnamon

2 tsp baking powder

2 tsp bicarb soda

3 cups grated carrot (roughly four big carrots)

1 cup vegetable oil

4 eggs

1/2 cup walnuts, chopped

Cream cheese icing

250g cream cheese

80g butter, softened

1 cup icing sugar, sifted

1 tbs lemon juice OR 1 tsp vanilla extract

Preheat oven to 180C. Line cupcake tin with patty pans.

Combine all dry ingredients in a large mixing bowl and stir well to combine.

Add grated carrot, oil and eggs, mixing until the dry ingredients are moistened and then beating eith an electirc beater for two minutes. Mix will be quite runny.

Fold in the walnuts and spoon into pans.

Bake for 25-30 minutes and cool on a rack before icing.

For icing, beat butter and cream cheese together in an electric mixer until smooth. Beat in icing sugar and flavour and beat until light and fluffy.

Friday, July 31, 2009

The pastry experiment


EATING all those fabulous French pastries, as well as reading about fabulous French creations, inspired me to try to tackle one of my great baking fears: pastry.
Yeast, I’m fine with. Meringue? No worries. But the thought of making pastry, for some reason, sends me all to water.
Or it did, I should say, until I sucked it up, set an afternoon aside and had a go at creating these apple frangipane tarts.
Before I even pulled my apron on, several hours were spent sitting in front of the bookshelf, surrounded by piles of cookbooks and the laptop, searching for just the right recipe for both the tart shell and the frangipane base.
Frangipanes appear to go one of two ways: cakey or creamy. Since I didn’t have any cream in the house and it was cold outside, I went with a cakey, Bakewell tart-style recipe from my favourite cookbook, The Essential Baking Cookbook.
Recipes for a basic shortcrust pastry are all very similar, so, armed with a mix of recipes from the baking bible and Tartelette, the other baking bible, I was set to go.
Five hours later, the kitchen looked like a bomb had hit it. There was flour on the floor, pastry scraps on the bench (and the floor) and I think I used every bowl in the house. I wish I’d taken a photo ... although on second thoughts, it's probably best not to have any photographic evidence. Geez it was fun though.
And how did they turn out? Well, the pastry was a bit tough in places (I got a bit nervous that it wasn’t coming together enough and I think I added too much ice water) and the frangipane rose more than I was expecting, turning my artfully arranged apple pieces into the Mongolian steppes rather than the delightful roses I was hoping for. But they tasted pretty good.


Apple frangipane tart

Quantities enough for one 20cm tart, or (as I did) two 9cm tarts and a freeform attempt with the leftovers

Shortcrust pastry

1 cups plain flour
90g unsalted butter, chilled, chopped
2 tsp caster sugar
2 tbs ice water
1 egg yolk

Sift the flour into a bowl and stir in sugar. Add butter and, using your fingertips, rub butter into flour mixture until it looks like breadcrumbs. (You can use a food processor, in fact most recipes suggest it, but I don't have one.)
Make a well in the middle and add egg yolk and almost all the iced water. Mix with a flat-bladed knife and add the rest of the water if it seems dry.
Turn out onto a floured surface, pat into a disc and wrap in cling wrap. Refrigerate for about 30 minutes.
Divide the pastry into three and roll it out between two sheets of baking paper to cover the base and sides of the tin you're using. Gently transfer into greased tin and refrigerate again to rest.
Blind bake shells in a pre-heated 180C oven for 10 minutes, remove the paper and baking beads and then bake again for 7 minutes or until golden and dry.
Allow to cool.

Frangipane
90g unsalted butter
1/3 cup caster sugar
2 eggs, lightly beaten
Several drops almond essence (amount to taste)
2/3 cup almond meal
1/3 cup self-raising flour

Cream butter and sugar with electric beaters until light and creamy and add the egg and almond essence, beating thoroughly after each addition.
Fold in the almond meal and sifted flour with a metal spoon.
Spoon the frangipane into the tart shells and arrange sliced apple on top. Brush apple with a little melted butter and sprinkle sugar over the top.
Bake for 35 minutes, or until risen and golden.


Wednesday, July 22, 2009

A religieuse experience


IT'S not just a bad pun (what can I say? Comes with the territory). I have had the closest thing to a religious experience I'm probably ever likely to experience and it was all down to - of all things - the French.


See, I went to France a little while ago and one of the highlights of a too-short trip was a visit to Laduree, a Parisian patissierie that's been in business since 1862.


When I visited, on a Sunday, the salon de the was packed with very excited-looking women munching their way through vast arrays of delicacies, while the queue for the cake store a emporter - or takeaway - was out the door. Since that gave everyone time to survey the magical range of goodness behind the glass counter, I've never seen people happier to stand in a queue.


Much frantic deliberating later, I walked out the proud possessor of a religieuse chocolat (on the right in the above picture) and a Saint-Honore pistache fraise; or, as the Laduree website describes them, cream puff pastry [with] chocolate confectioner’s custard and puff pastry, cream puff pastry, light pistachio confectioner’s custard, strawberry stew, strawberries [and] pistachio Chantilly cream.


I only know they were the best things I've ever eaten.


The pastry was crisp and flaky, giving way in the profiterole to a gush of smooth, chocolatey custard with the added bonus of a mini-profiterole filled with vanilla creme patissiere on top.


The Saint-Honore's layers of pistachio cream and custard were saved from being sickly-sweet by the fresh strawberries and a secret heart of strawberry coulis, buried under the mounds of green-tinged cream.


The only problem was, they weren't big enough.


Monday, July 20, 2009

Room for one more on the bandwagon?


SO I'VE been pondering starting a blog for a while now.
I'm not the kind of cook who whips up astonishingly good meals out of her head; I can't admit to making sweets so beautiful they make you sigh with longing. I can't take a beautiful picture and, God help me, I didn't even watch MasterChef Australia! What business do I have gibbering about baking goodness among such talent?
But baking makes me happy, it's as simple as that. Trying new things, playing with dough and icing, revisiting old favourites, is a joy that's guaranteed to leave me feeling at peace with the world (well, when things go well). It never fails to amaze me that you can take butter, sugar and flour and finish with something that's completely different each time, something that's greater than the sum of its parts. And so I'm jumping on this bandwagon despite my baking faults, despite the fact the rest of the known world started a blog about 10 years ago, because it seems like the food blogging community is wide, kind and (hopefully) very forgiving.

Anyway, enough philosophy; bring on the cake!

Among my many life quests is to find myself a go-to chocolate cake recipe, learn it off by heart and always have the ingredients for it in the pantry. Oh sure, I have specific favourites - the chocolate fondant, the flourless chocolate cake, the chocolate fondant, the citrus cake, the chocolate fondant - and there's always a go-to recipe of the moment; if you rang me right now and said "I'll be at yours in an hour", there would be a chocolate cake waiting for you (or at least in the oven) when you rang the bell. But is it the best cake ever? Is it MY cake, the cake I can go to my grave being known for? Not quite yet.

Of course, looking for MY cake means I have to make, and taste-test, a lot of cakes that could be contenders. Somehow I manage to cope with this crushing burden.

I made this cake for my brother's birthday (which is around Easter, hence the egg decoration ... I did say I'd been pondering starting a blog for a while) and judging by the speed with which it disappeared, it's a fairly solid contender for MY cake. But the search continues.


Basic chocolate cake (adapted from Donna Hay)

Makes 1 20cm round cake, 12 big cupcakes or 24 mini-cupcakes.

125g butter
3/4 cup caster sugar
2 eggs
1/2 cup milk
1 1/4 cups self-raising flour
2 tbs cocoa powder
100g dark chocolate, melted

Icing

80g butter
1 cup icing sugar
1 tbs cocoa

Preheat the oven to 160C and grease and line the tin of your choice. Beat the butter and sugar until light and creamy. Add the eggs, one at a time, and beat well. Sift the flour and cocoa in and beat until combined. Fold through the milk and melted chocolate and pour into the tin. Bake until cake springs back in the middle and is cooked when you test it with a skewer.


To make the icing, beat the butter until light and creamy. Sift in the icing sugar and cocoa and beat until combined. If you make the cake as cupcakes, or want to layer the icing in the cake, make double the amount.